My sister, Amelia, in case you haven't met her, is awesome. And she's crafty. I'm crafty too, but not like she is. She has great ideas. She's one of the people that thinks of the stuff you see on Pinterest, then puts it on Pinterest for the rest of us to copy.
 |
| This is Amelia. Best friend in the whole wide world. |
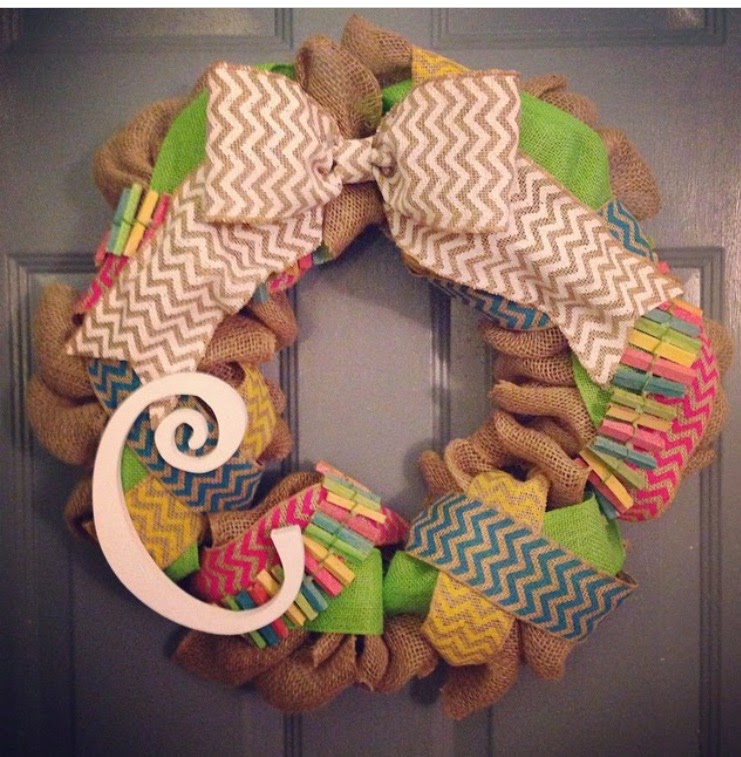
Amelia makes wreaths and door hangers. And they are presh.
 |
| It's a sweet door hanger. |
 |
| Burlap ribbon, and a monogram...I need one of these. |
 |
| And then there's this. Don't you love it? I'm hoping my sweet sister will send me one in the mail...(hint, hint). |
She's super talented guys, and you want her to make you a wreath, so follow her on instagram @ameliamadelyne and check out the fun stuff she makes!
I've had a fun day today. I got to complete my very first monogram for money job for a dear friend. I was a nervous wreck about doing it. It's one thing if you mess up your own stuff, it's a whole other thing to mess up someone else's. (I've done it before, and all I can say is Sorry again!!) All that to say, it's a scary thing to take something that you really love and offer it to someone else, because, what if they don't find the work that is so near to your heart, good enough?
Risks are always worth the reward.
So I took a risk and monogrammed for a friend. It was fun, and I didn't suck and the monogram didn't suck.
I'm realizing that I had somehow buried a part of me over these last four years. It can sound cheesy to say that this is part of who I am, and you are allowed to think that, but let me just say.."This is a part of who I am." I really love doing this, and it brings me joy, so I think that it might be part of my DNA. As in, I was created this way, so there's something in this for me, that I get to use to draw people to Jesus. Love. That.
Monogramming looks beautiful, but some of you might not know the process.
Here's the process I went through with the blanket that I got to do today...It was so much fun!
Step 1: Make the design. I use Embird to put my designs together and then I open them in my Singer software to get them to go to the machine. This font is Carmen by 8clawsandapaw.com. It's a good font for a baby boy. Not too curly, but still fun.
Step 2: Hoop the blanket. I hoop my stabilizer and then pin down my blank. On this particular project I had my machine put down a basting stitch to hold the blanket in place. This comes out easy breezy with a seam ripper once you are done.
Step 3: Gather up the extra blanket and secure it together to keep things a little more manageable. Float a piece of water soluble stabilizer on top, and then send the design to your machine! Chip clips are obviously the high fashion choice when securing a blanket. Duh.
Step 4: Voila!
So there it is, from conception to reality. In my heart, this is such a picture of what has been happening in me lately and this little piece of me getting to go from dream to reality. I'm so grateful that Jesus has provided a way for me to chase after His heart by responding to the desire He put in my heart.
Thanks for reading guys!


No comments:
Post a Comment